Data Import Function

The import function is used to synchronize data from a test instrument or file with the IZYTRONIQ database.
This function can be found in the “STATIONARY OBJECTS” menu

under the “IMPORT” function

. The import wizard is started by clicking this function.
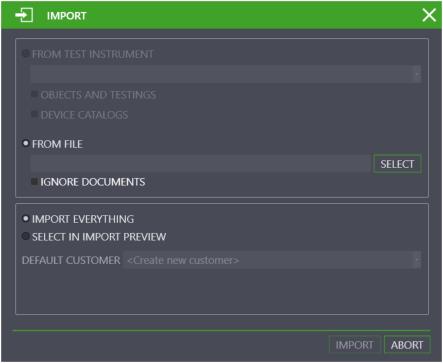
The import wizard asks how you would like to import data. Available options depend on your IZYTRONIQ variant:
– FROM TEST INSTRUMENT: you can choose from amongst all connected instruments here.
OBJECTS AND TESTS are selected for import by default.
– FROM FILE: Tap the “SELECT” field in order to select the file to which the data will be imported. You can also select the file format in the open Windows file explorer window.
IGNORE DOCUMENTS: Reports and attachments are not imported when importing IZY files.
– RESOLVE ACCORDING TO ID: A reference is used during import in order to determine whether or not changes have been made to an object (e.g. a new measurement has been added). By default, an internal, invisible reference tag is used for import. If problems arise in this respect during import, use the ID of the measuring instrument as a reference for the import with this option.
Select IMPORT ALL or SELECTION IN IMPORT PREVIEW in order to start the import.
– After selecting IMPORT ALL and clicking IMPORT, import runs automatically.
– If SELECTION IN IMPORT PREVIEW is selected,
the data in the IMPORT PREVIEW are displayed first. These data can be selected and post-processed here. The selected objects are subsequently imported into the
IZYTRONIQ database by selecting the

function.
– A customer from the database can be specified via STANDARD CUSTOMER, if the data include a customer.
Successful import and any transmission errors that may have occurred are displayed.
If conflicts occur between existing data and data to be imported which cannot be resolved automatically, the conflict manager is activated.
The Conflict Manager
If conflicts occurred during import and objects could not be transferred as a result, these objects are not simply discarded – an attempt is made to resolve these conflicts manually. Affected objects are copied to a separate file/table to this end. At the same time, a warning symbol appears in the status bar and the entries are highlighted in red.
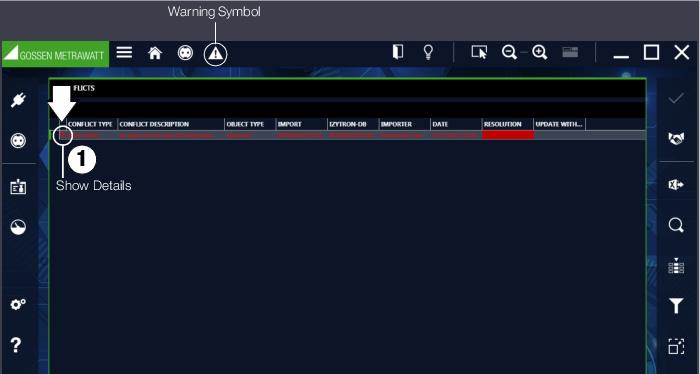
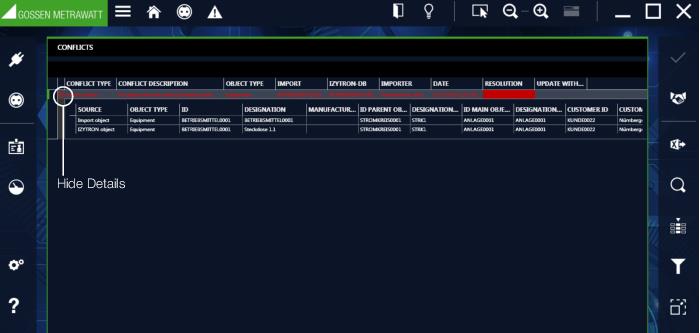
Conflicts can be dealt with here. There’s a description for each conflict. The details associated with the conflict objects (1) are displayed by clicking the detail icon (+).
By repeatedly clicking the handshake icon (2), you’re offered various possible methods for resolving the conflict: ignore, merge or new. These depend on the respective conflict. Alternatively, clicking in the “Solution” column opens a pull-down menu from which possible solution methods can be selected.
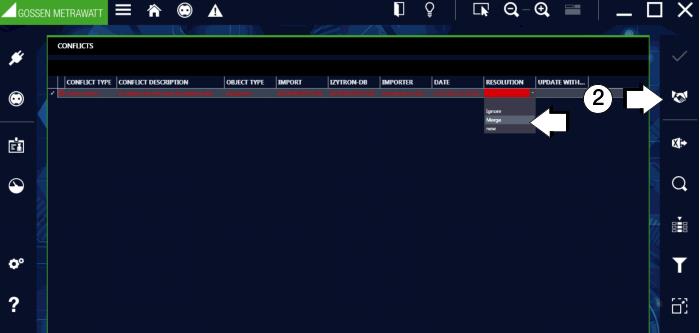
The red highlighting disappears after selecting the desired method. The respective conflict is resolved by saving the changes. The resolved entry is then no longer displayed in the conflict manager and the respective object is integrated into the main database. The conflict manager is exited after all of the conflicts in the list have been resolved.
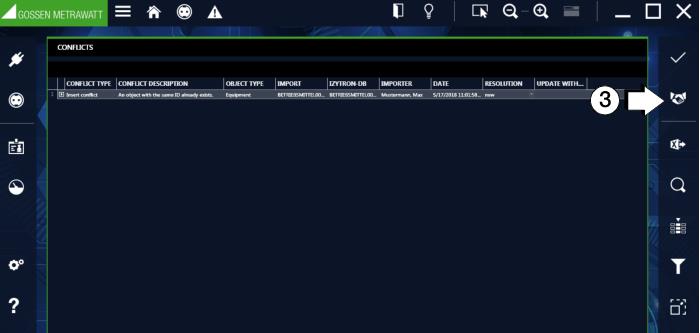
The following solution options are available:
Tools:
Conflict solving
Selection of the solution method
(Since this tab is a list, the functions of the list view apply and, in addition, the list icons in the toolbar are activated – see
„Lists“.)


 under the “IMPORT” function
  . The import wizard is started by clicking this function.
 function.


