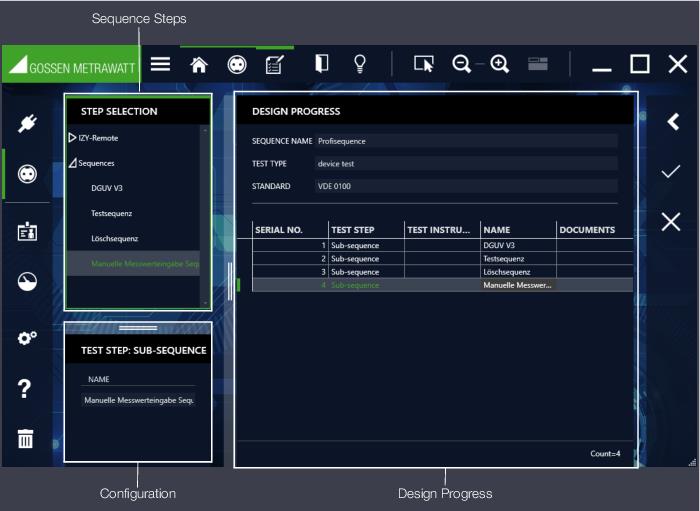
3. Window on the right: Design progress display: A breakdown of current sequence progress appears here.


 | Attention! The sequences and the individual sequence steps may only be created with the help of the sequence editor by a qualified electrician or under the direction and supervision of a qualified electrician. Gossen Metrawatt GmbH assumes no liability for user-created sequences! |
 | Attention! Connecting line voltage to the test socket at the SECUTEST or SECULIFE test instrument and performance of a function test are only permissible if the test object has already passed all safety test steps! Depending on the test object’s protection class, this means that visual inspection, as well as measurement of protective conductor resistance and insulation resistance, must have been passed. |
 | Attention! When creating sequence steps, make sure that the limit values entered always correspond to the current standard! |
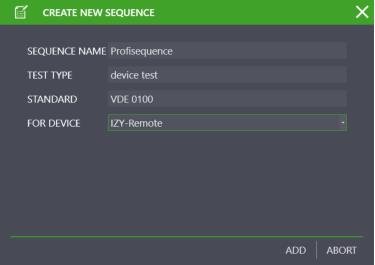
 in order to create a new sequence.
 .
. .
. . Creation of the sequence step is completed by filling in these fields. Now a new step can be added to the sequence by means of drag & drop. The following operations can be executed in the design progress window in the sequence of steps created in this way:
 .
.


